
Ever spent hours setting up a shot, only to realize your lighting makes your subject look flat, uninteresting, or even worse—off-color? I remember the first time I tried to get creative with RGB Tube & LED Panel Lights. I was dazzled by the vibrant colors but totally lost when it came to making them work for my scenes. It was frustrating, honestly. I knew the lights had potential, but I lacked the know-how to wield them properly. That lightbulb moment hit me hard: good lighting isn’t just about brightening a scene; it’s about shaping mood, depth, and storytelling.
Why Proper RGB and LED Lighting Can Transform Your Videos
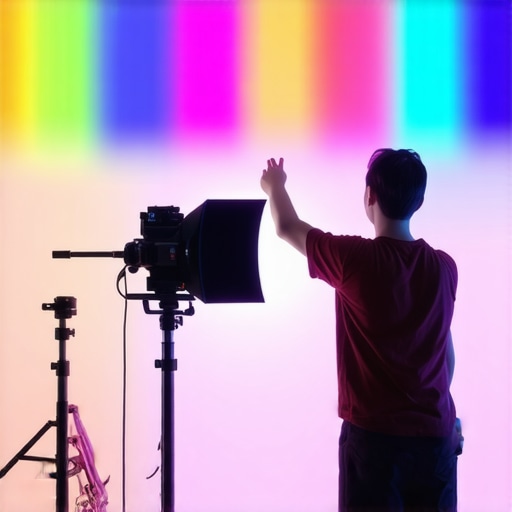
In 2024, there’s an abundance of options for lighting your videos, but not all lights are created equal. RGB Tube and LED Panel Lights have become game-changers for creators who want flexibility and creativity. These lights can do so much more than just illuminate—they can set a tone, highlight details, or even add a splash of color for artistic effects. But with great power comes great responsibility. Without the right techniques, your vibrant RGB lights can turn into a distracting mess or worse—make your footage look unprofessional.
That’s why mastering their use is vital. I’ve learned that a few simple tips can make all the difference. For example, knowing how to balance color temperatures, use softboxes effectively, or layer lights for depth transforms a basic setup into a cinematic masterpiece. And trust me, this isn’t just theory—these are the tricks I’ve used to elevate my videos. According to a recent study, proper lighting can increase viewer engagement by up to 80%, which says a lot about why we should take this seriously.
So, if you’ve ever felt overwhelmed by all the RGB options or unsure how to get that perfect shot, don’t worry. Today, I’ll share actionable tips to help you harness the true potential of RGB Tube & LED Panel Lights. Ready to turn your lighting game around? Let’s dive into the essentials that will make your videos stand out in 2024.
Is RGB Lighting Actually Worth the Hype?
When I first started, I was skeptical. All those color-changing features seemed gimmicky—until I made the mistake of overusing them without understanding how to control their impact. I wasted hours on setups that looked chaotic instead of creative. That early mistake taught me a valuable lesson: the key isn’t just having RGB lights, but knowing when and how to use them effectively. If you’re worried about whether RGB lighting is just a flashy trend or a genuine tool, I get it. But the truth is, when used thoughtfully, RGB Tube & LED Panel Lights can elevate your visuals and set your content apart. Want to learn how? Check out our detailed guide on LED Panel & RGB Tube Light Tips for Creators.
Now that you know why this matters, let’s explore some practical steps to master your lighting setup and make those colors work for you, not against you. Ready to get started?
Set Up Your Space for Precise Control
Before diving into color effects, organize your workspace. Use solid-colored backdrops or neutral walls, which help you see true color renditions and prevent unwanted color reflections. I once tried to shoot a vibrant scene with a cluttered background, which made my RGB lights look off. Clearing the space and adding a neutral backdrop instantly improved color accuracy and made adjustments easier. For more advanced soft lighting, check out softbox tips.
Balance White and Color to Match Your Scene
One common mistake is overusing RGB colors without considering white balance. Think of your lights like spices in cooking: too much can ruin the dish. Start with setting your key light to a neutral white (around 5600K) to establish a base. Then, add RGB accents carefully to enhance mood or create effects. A trick I used during an evening shoot was to set my main light to white and use a secondary RGB panel to add subtle blue hues, creating a cool, calming atmosphere. This layering technique adds depth and professionalism. For inspiration, explore key light techniques.
Adjust Brightness and Saturation for Impact
Brightness and saturation control are your best friends. Brightness determines the overall exposure, while saturation influences how vivid the colors appear. During a recent indoor shoot, I cranked the saturation too high, which resulted in an unnatural look. Instead, I reduced the saturation and increased the brightness slightly, achieving a more balanced and appealing scene. Use your lights’ app or control panel to tweak these settings precisely. For creative effects, see RGB tube effects.
Layer Lights for Depth and Dimension
One of the most powerful techniques is to layer multiple lights. Position your main (key) light at a 45-degree angle to your subject, then add fill lights at lower intensity to soften shadows. Use RGB lights to add background pops of color or accent highlights. I once set up a scene with a strong key light, a subtle fill, and an RGB backlight that changed color throughout the shot. This created a dynamic, cinematic look. For detailed layering strategies, check softbox and RGB layering.
Use Light Modifiers to Shape Your Light
Modifiers like softboxes, grids, or diffusers are essential. They soften or direct light, helping you control spill and focus. I once used a softbox with my RGB tube to create smooth, even lighting on a subject’s face during a portrait shoot. The soft light reduced harsh shadows and made the colors pop delicately. For softbox tips, visit softbox and key light strategies. Remember, the shape and size of your modifier can dramatically change the scene’s mood.
Control Color Transitions Smoothly
Gradual color transitions add professionalism. Use your lighting app to create fades or flickers that mimic natural changes or artistic effects. In a recent evening shoot, I set my RGB lights to slowly shift from warm amber to cool blue, matching the sunset scene. Timing and easing are crucial—test different speeds to find what feels natural. For creative uses, see RGB effects.
Experiment and Review Your Results
Finally, don’t be afraid to experiment. Take test shots, review on a larger screen, and adjust. I once spent hours tweaking my lights for a dramatic scene, only to realize I needed more contrast. Adjusting brightness, angle, or color saturation made a world of difference. Keep notes of your settings for future projects. For more advanced lighting setups, explore LED panel and RGB tube lighting tips.
Many creators jump into RGB Tube and LED Panel Lighting with enthusiasm, but I’ve noticed a few pervasive misconceptions that can hamper your progress if not addressed. Let’s dig deeper into what most people get wrong about these versatile lights, and how understanding the nuances can elevate your video quality to professional levels.
Myth: More Colors Always Make Your Scene Better
It’s tempting to think that a rainbow of colors automatically boosts creativity. However, overusing RGB options can lead to distraction rather than enhancement. The real trick is to use color strategically, not randomly. For example, a subtle blue hue can evoke calmness, while a warm amber creates intimacy. Excessive saturation or rapid color shifts without purpose often look unprofessional. Remember, effective lighting is about enhancement, not clutter. For guidance on subtle color layering, check out this comprehensive guide.
Beware of the Oversimplified White Balance Fix
Many assume that setting your lights to the same white balance makes everything perfect. But in practice, balancing white with colored lighting involves more nuance. When you match white balance during setup, it’s a baseline—then, you can creatively adjust RGB layers for mood. Overcompensating or ignoring the ambient light temperature can cause color shifts that look unnatural. Advanced creators often use a calibrated gray card or color meter to fine-tune their setup. This ensures that when you add RGB accents, they complement rather than clash with your scene’s white balance. For more sophisticated techniques, explore key light strategies.
Lighting Mistake: Ignoring Light Modifiers and Direction
It’s a common mistake to think that RGB and LED panels alone are enough. The placement and shaping of your light are critical. Without proper modifiers like softboxes or grids, your lights can produce harsh, unflattering shadows or spill. Direction matters—placing a light at the wrong angle can flatten your subject or cause unwanted reflections. When working with colored lighting, modifiers help control spill and make your colors pop in the right places. For example, a softbox diffuses RGB light evenly across a subject’s face, creating depth and dimension. To master this, review softbox techniques.
Are You Falling for the Brightness Trap
Many creators believe that turning up the brightness on RGB lights automatically improves their scene. In reality, over-brightening washes out colors and destroys contrast. The key is balancing brightness with saturation and exposure. Sometimes, lowering the intensity and adjusting the camera’s settings yields a more cinematic look. Also, brighter isn’t always better—dim, controlled lighting can add mood and focus. Advanced users often use dimming curves and app controls to finesse their lighting. This prevents your scene from looking flat or overly artificial. For detailed brightness control tips, see LED panel tips.
How to Avoid the Trap of Unfocused Color Transitions
Smooth color transitions are a hallmark of professional videos, but many underestimate their complexity. Rapid or jarring shifts can distract viewers. To create seamless fades, control the timing and easing of your RGB effects carefully. Using apps or DMX controllers allows for precise, gradual transitions that mimic natural lighting changes or artistic effects. During a recent sunset scene, I set my RGB lights to slowly transition from warm to cool tones over several minutes, which looked incredibly natural and cinematic. Practice and patience are your best tools. For creative inspiration, check out RGB transition techniques.
Have you ever fallen into this trap? Let me know in the comments. Mastering these nuances isn’t just about having the latest gear but understanding how to wield it with intention and precision. When you do, your videos will stand out with professional polish and creative flair that truly captivates your audience.
Maintaining your RGB Tube and LED Panel Lights is crucial to ensure they continue delivering vibrant colors and consistent performance over time. As someone who has relied heavily on these tools, I can attest that investing in the right equipment and adopting effective maintenance routines saves you money and keeps your setup professional. In this article, I’ll share the specific tools I personally use, maintenance strategies, and where I predict the future of lighting technology is heading.
How do I keep my lighting equipment in top shape over time?
First and foremost, regular cleaning is essential. Dust and dirt can accumulate on lenses, diffusers, and vents, causing color distortion and overheating. I recommend using compressed air to blow out dust from vents and soft microfiber cloths for lenses. For stubborn grime, a gentle mixture of isopropyl alcohol and water works wonders. This routine prevents overheating and maintains color accuracy. Additionally, check the power cords and connectors periodically for wear and tear—replace any damaged components immediately to avoid failures during critical shoots.
Tools I recommend for ongoing maintenance
One of my favorite tools is a digital multimeter, which I use to verify voltage and current levels. This helps detect electrical issues early, preventing costly repairs. For cleaning, a set of soft brushes and microfiber cloths is indispensable. I also keep a can of compressed air handy to clear dust from vents and fans. When it comes to firmware updates, I rely on the manufacturer’s software—regular updates often fix bugs and improve stability, especially for RGB control apps. Speaking of software, I highly recommend using dedicated control apps like the latest RGB app to fine-tune your lighting and troubleshoot issues remotely.
Future trends and long-term investment
As LED technology advances, expect smart lighting systems to become more integrated and self-maintaining. Features like automatic calibration, built-in diagnostics, and modular components will simplify upkeep. Investing in brands that offer firmware upgradeability and robust customer support now can save headaches later. Moreover, modular designs allow easy replacement of parts—so instead of discarding an entire fixture, you can swap out a faulty LED strip or driver, extending the lifespan of your setup.
Where should I focus if I want to scale my setup?
Scaling involves not just adding more lights but ensuring they all function harmoniously. Consider adopting centralized control systems that manage multiple fixtures simultaneously. I personally use a DMX controller, which provides precise control over brightness, color, and effects across all connected lights. This setup is invaluable for professional shoots where consistency is key. As the industry moves toward wireless control and automation, keeping an eye on emerging tools like Bluetooth-enabled fixtures or AI-powered calibration systems is wise. These innovations promise less manual maintenance and more creative freedom.
In conclusion, maintaining your RGB and LED lights isn’t just about cleaning and checking cables. It’s about investing in the right tools, staying updated with firmware, and planning for future upgrades. Try incorporating a digital multimeter into your routine or exploring centralized control apps—I guarantee these small steps will pay off in long-term performance and creative flexibility. For detailed guidance on softbox maintenance and setup, check out this comprehensive softbox guide. Keep your gear in top shape, and your creativity will shine brighter for years to come!
The Hardest Lesson I Learned About RGB Lighting
One of my biggest realizations was that overusing vibrant colors can distract rather than enhance. Less is often more, especially when you understand how to strategically layer and balance your lighting. I once went overboard with color saturation, resulting in a scene that felt chaotic. Learning to use subtle accents instead of overwhelming hues transformed my videos into more polished, cinematic pieces.
3 Myths About RGB Lights That Held Me Back
Initially, I believed that more colors automatically meant better visuals. Turns out, excessive color shifts can be jarring. Also, I thought setting white balance alone would fix all color issues—yet, nuanced adjustments are necessary. Finally, I underestimated the importance of light modifiers; softboxes and grids are game-changers for shaping your light and controlling spill. Busting these myths helped me unlock the full potential of RGB and LED panel lights.
What Experts Won’t Tell You About Maintaining Your Gear
Most overlook routine maintenance, but regular cleaning and firmware updates are vital. I use compressed air and microfiber cloths to keep lenses and vents dust-free, which preserves color accuracy and prevents overheating. Investing in tools like a digital multimeter and staying on top of firmware updates ensures your lights perform consistently, saving you money and stress in the long run.
My Essential Toolkit for Creating Flawless Lighting
For me, a high-quality softbox is indispensable for softening RGB light and adding dimension. I trust control apps like the latest RGB app for precise adjustments and smooth transitions. A reliable power supply and a set of cleaning tools round out my kit. These essentials enable me to craft professional scenes effortlessly.
Seize Your Moment and Illuminate Your Creativity
Lighting with RGB and LED panels is a powerful way to enhance storytelling. The key is to experiment, learn, and adapt your setup to match your vision. As technology evolves, so does the potential for creative expression. Don’t hold back—start integrating these techniques today and watch your videos transform.
What’s the biggest challenge you’ve faced with RGB lighting? Share your experience below and let’s grow together!
![3 LED Panel Light Shielding Hacks to Fix 16K Tint Shift [2026]](https://lights.creatorrigreviews.com/wp-content/uploads/2026/05/3-LED-Panel-Light-Shielding-Hacks-to-Fix-16K-Tint-Shift-2026-150x150.jpeg)


3 responses to “RGB Tube & LED Panel Lights: Essential Tips for Creative Video Lighting in 2024”
Reading through this article really resonated with me, especially the part about balancing white and RGB colors. I’ve often found that starting with a neutral white light as a base makes a huge difference in achieving natural-looking colors, especially when adding creative RGB accents. I used to over-saturate my scenes because I thought it looked vibrant, but it often ended up distracting viewers rather than enhancing the mood. Layering lighting effectively has been a game-changer for me—I usually set my key light at a neutral temperature, then add subtle RGB effects to complement the scene’s tone. I’m curious, for those working in mixed natural and artificial lighting environments, how do you manage color consistency? Do you find using a color meter or gray card helps maintain accurate hues when controlling multiple light sources? It would be great to hear different approaches from fellow creators trying to perfect their lighting setups.
This article really hit home about the importance of subtlety in RGB lighting. I’ve seen many creators jump straight into wild color schemes without understanding how to control the saturation or transition effects, and it often ends up looking amateurish. I’ve found that starting with a strong white balance and using RGB accents sparingly can really elevate a scene instead of overwhelming it. Once I learned to layer lights — especially using softer modifiers like diffusers or softboxes on the RGB panels — the colors blend much more naturally. It’s funny how sometimes a slight hue shift, like a gentle blue or warm amber, can dramatically change the mood without even needing intense saturation. Have you guys experimented with color transitions during scenes? I think gradual fades from warm to cool tones are incredibly cinematic when timed right. What’s been your experience with achieving smooth color shifts? Would love to hear tips or challenges faced by others in mastering these effects.
This is such a detailed breakdown of mastering RGB and LED lighting. I totally agree with the emphasis on layering and control. From my own experience, I’ve found that even small adjustments in the positioning of lights can radically change the mood—sometimes just raising a fill light a few inches or angling it differently can soften shadows or highlight specific features better. Also, I’ve started using some inexpensive color gels on my RGB panels to achieve warmer or cooler tones when presets aren’t enough, which gives me more creative flexibility without overcomplicating the setup. Regarding color transitions, I’ve experimented with easing effects in my lighting app, making the shifts feel more natural rather than abrupt. Has anyone tried programmable DMX systems? They seem a bit more complex but could really enhance the smoothness of transitions and synchronization across multiple lights. How do others here manage consistent color blending when working with different brands or models of RGB lights?