
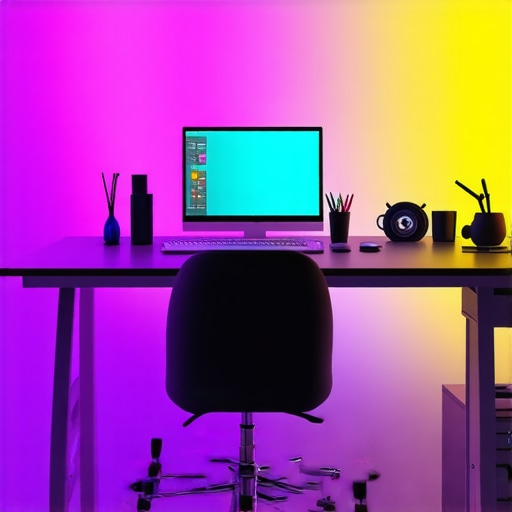
Ever spent hours trying to tweak your lighting only to realize it still doesn’t look quite right on camera? I’ve been there—stuck in that frustrating loop of dimmer switches, color mismatches, and endless trial and error. One day, I finally had a lightbulb moment when I realized my old lighting setup was holding back my creative potential. It wasn’t just about having lights; it was about choosing the right ones—specifically, RGB tube and LED panel lights that can truly elevate your studio. If you’ve felt the same frustration, trust me, the right lighting can make all the difference. Today, I’ll walk you through how to pick the best RGB tube & LED panel lights for your setup in 2024, so you can finally get that professional, vibrant look you’ve been chasing.
Why Lighting Is the Heartbeat of a Creative Studio
Lighting isn’t just about illuminating your space; it’s about setting the mood, highlighting your subject, and making your work stand out. Whether you’re streaming, filming, or taking photos, the quality of your light can make or break your content. Early on, I made the mistake of relying on generic, one-size-fits-all lights that just didn’t cut it. I didn’t realize how much more control I needed until my shots looked flat and lifeless. That’s when I discovered the magic of RGB tube & LED panel lights, which give you endless color options and brightness control—transforming a dull setup into a vibrant studio that sparks creativity.
Have you ever felt limited by your current lighting options? Or struggled to find lights that match your exact style?
Research shows that good lighting can boost viewer engagement by up to 80%, according to a study by Wistia. But here’s the thing: not all lights are created equal. Picking the wrong type can lead to more frustration and less creative freedom. I learned this the hard way when I bought a popular RGB light that looked great in the store but was a nightmare to set up and control. It’s a classic mistake—thinking cheap or flashy means better. That’s why I want to guide you through the key features to look for, so you avoid my pitfalls and choose lights that truly serve your creative vision.
Ready to upgrade your studio setup? Let’s dive into what makes the best RGB tube and LED panel lights for 2024, so you can light up your projects with confidence and style.
,
Pick Your Brightness Wisely
Start by assessing your studio size and the kind of lighting you need. For small setups, a 1,000 to 2,000 lumen RGB tube or LED panel might suffice, but larger studios demand more powerful lights, around 5,000 lumens or higher. I once tried to brighten a big room with a couple of small panels, but the shadows remained stubborn. So, I upgraded to a few high-lumen panels, and the difference was night and day, giving my shots that professional glow. Remember, brightness isn’t just about raw power; it’s about matching your space and purpose. Check out the latest LED panel innovations to find models with adjustable lumen settings.
Opt for Flexibility in Control
Effortless control over color and brightness makes all the difference. Many RGB lights come with app controls, remote dials, or DMX compatibility. I learned this firsthand when I bought a fancy RGB tube light that looked perfect but was a nightmare to operate. After switching to a model with intuitive app controls, I could fine-tune my color schemes mid-shoot without fuss. Think of it like a car’s cruise control—smooth, precise, and user-friendly. For best results, look for lights with customizable presets and scene modes. Want to master color blending? Check out this guide on RGB effects.
Color Accuracy Matters
Look for lights with high CRI (Color Rendering Index) and TLCI (Television Lighting Consistency Index). These ensure your colors are true and vibrant on camera. I once used a cheap RGB panel that washed out my skin tones, making everyone look pale and sickly. Upgrading to a model with CRI over 95 transformed my footage, making skin tones pop naturally. Think of CRI as the ‘truth meter’ for colors. When shopping, prioritize models that boast high CRI and TLCI scores, especially if you shoot portraits or product videos. For deeper insights, browse effective lighting strategies.
Choose Durable and Expandable Equipment
Studio lights take a beating over time, so durability is key. Look for models with metal or high-quality plastic housings and reliable power supplies. I once bought a budget RGB tube light that broke after a few months, forcing me to replace it prematurely. Now, I prefer lights with sturdy build quality and easy-to-replace parts. Additionally, consider how well your lights can expand your setup—do they support mounting accessories or additional units? This flexibility lets you grow your studio without starting from scratch. To explore top-rated options, visit our curated list of best RGB lights for 2024.
Ease of Mounting and Positioning
Effective lighting isn’t just about the light itself but also how you position it. Look for lights with versatile mounting options—like standard tripod threads or magnetic mounts. I once struggled with a bulky panel that didn’t fit my rig, wasting precious setup time. Since then, I stick to slim, lightweight models with multiple mounting points, making it easy to aim and adjust. Proper placement ensures even coverage and reduces shadows. For expert placement tips, check key lighting techniques.
Conclusion
Choosing the right RGB tube and LED panel lights boils down to matching your studio’s size, control needs, color accuracy, durability, and mounting options. By focusing on these core aspects, you’ll ensure your setup is future-proof and capable of producing vibrant, professional-quality content. Remember, investing in good lighting is investing in your creative freedom. Happy shooting!
When it comes to mastering studio lighting, many creators fall into traps based on misconceptions that can hinder their progress. Let’s dig deeper into what most people get wrong about RGB tube and LED panel lights, and how understanding these nuances can elevate your setup. One widespread myth is that brighter lights always mean better results. While high lumen output is important, it’s not the only factor; color accuracy and control are equally critical. Relying solely on brightness can lead you to overcompensate with power, resulting in washed-out colors or unnatural skin tones. Instead, focus on high CRI and TLCI ratings to ensure your colors stay vivid and true, especially if you’re doing portrait or product work. For insights on achieving natural, flattering light, check out fill light secrets.
Another misconception is that all RGB lights are interchangeable. In reality, the quality of components and control systems varies widely, impacting your creative flexibility. Many owners buy budget models that promise endless colors but lack precise control or suffer from flickering issues. This can ruin a shoot or live stream. The key is to select models with robust app controls, scene presets, and DMX compatibility to fine-tune your lighting effortlessly. Don’t fall into the trap of thinking that cheap equals good—investing in reliable, well-built lights pays off in the long run. For advanced setup tips, see the ultimate guide.
A particularly sneaky mistake is ignoring the importance of mounting and positioning. Creators often focus on the light’s features but overlook how placement affects the overall look. Poor mounting options or static positioning can cause uneven lighting, shadows, or glare. Advanced users know that versatile mounting solutions and strategic placement can dramatically improve the quality of your shots. Experimenting with angles and distances—like using key lighting techniques—is essential for professional results. Remember, the right light in the wrong position is just as ineffective as the wrong type of light.
Have you ever fallen into this trap? Let me know in the comments. Mastering these nuances ensures your lighting setup isn’t just bright—it’s beautiful, accurate, and adaptable, helping you create content that truly stands out.
Keeping your RGB tube and LED panel lights in top shape requires more than just turning them on and off. Regular maintenance and the right tools can extend their lifespan, ensure consistent performance, and help you get the most out of your investment. Over time, dust, heat, and mishandling can degrade your lighting equipment, leading to flickering, color shifts, or outright failures. That’s why I swear by a few key tools and routines that keep my setup running smoothly.
How do I maintain my lighting gear over time?
First, always keep your lights clean. Use a soft, lint-free cloth to wipe down the exterior regularly, especially after sessions when dust or debris may settle. For internal components, compressed air is your best friend—gently blowing out fans, vents, and LED lenses prevents dust buildup that can cause overheating or uneven light output. I personally use a small, portable air blower, which helps me quickly clear dust without disassembling the unit.
Second, invest in a quality power strip with surge protection. Lights are sensitive to power fluctuations, and a sudden surge can damage internal circuitry. I prefer models with individual switches for each outlet, so I can turn off unused equipment and reduce wear. Additionally, make sure your power supplies are cool and well-ventilated; overheating is a common killer for LED components.
Third, keep a set of basic tools handy—screwdrivers, pliers, and a multimeter. When a light starts flickering or behaving unpredictably, these tools help diagnose issues quickly. For example, I use a multimeter to check voltage levels and ensure my power supply is providing consistent current, referencing the latest LED innovations that emphasize stable power delivery.
Finally, firmware updates are often overlooked but critical. Many modern RGB lights have software or app-based controls that can be updated to fix bugs or improve features. I regularly check the manufacturer’s website or app for updates—this simple step can solve flickering issues and unlock new color effects.
What tools do I recommend for optimal maintenance?
Besides the basic tools I mentioned, consider investing in a UV flashlight to detect hidden dust or residue on lenses. A microfiber cloth specifically designed for optics helps keep your lenses clear without scratching them. For more advanced troubleshooting, a portable oscilloscope can help identify electrical issues, though that’s usually for professional setups. For most creators, a good set of cleaning tools, a multimeter, and a reliable surge protector are all you need to keep your lights performing at their best.
Looking ahead, I believe the trend toward smarter, self-maintaining lighting systems will continue. Future models might include built-in diagnostics or even AI-driven performance monitoring, reducing the need for manual upkeep. In the meantime, regular cleaning and tool checks are your best bet for long-term success. I encourage you to try incorporating a routine cleaning session and maybe a quick check with your multimeter this week—small steps that make a big difference in your lighting reliability.
Remember, good maintenance is as vital as choosing the right equipment. For more detailed tips, explore fill light secrets and stay ahead in your creative game.
Looking to elevate your studio lighting game? The right RGB tube and LED panel lights can transform your content, making it more vibrant, professional, and engaging. After countless experiments and learning from my mistakes, I’ve discovered that selecting equipment based on specific features—like control, color accuracy, and durability—is the secret to consistent, stunning results. In this guide, I’ll share insights I wish I knew when I started, so you can avoid common pitfalls and make smarter choices in 2024.
Lessons from the Field That Changed My Approach to Lighting
- Don’t rely solely on brightness: I once bought a high-lumen RGB light, thinking more power meant better results. Turns out, color rendering and control matter just as much. High CRI scores ensure your skin tones and colors look natural and vibrant, which is essential for professional-looking content.
- Control is king: The ability to fine-tune your lights via app or remote makes a huge difference. I learned this firsthand when I switched to lights with scene presets and adjustable color temperature, saving time and frustration during shoots.
- Mounting options impact your setup: Versatile mounting solutions allow you to experiment with angles and positions, preventing uneven lighting and shadows. Investing in lightweight, adaptable mounts has made my workflow much smoother.
- Quality over price: Budget models often suffer from flickering or color shifts. Trustworthy brands with solid build quality and reliable control systems give you peace of mind and consistent results, even after months of use.
My Go-To Tools and Resources for Lighting Mastery
- Best RGB Tube & LED Panel Lights for 2024: This curated list has helped me find dependable, feature-rich lighting that fits my needs and budget.
- Ultimate Guide to RGB Effects: Mastering color blending and effects can take your content to the next level. This guide offers practical tips and creative ideas.
- Lighting Strategies for Studios: Learning how to position and layer lights creates depth and dimension, elevating your visuals beyond basic illumination.
- Fill Light Secrets: Achieving natural, flattering light is an art. This resource helped me understand how to use RGB lights as fill to enhance my shots naturally.
Your Next Creative Step Starts Now
Choosing the right RGB tube and LED panel lights is about aligning your equipment with your creative goals. The right tools, combined with strategic placement and control, can unlock your full potential as a content creator. Don’t wait—start experimenting with new lighting setups today and watch your work come alive with color and clarity. Remember, the best lighting is the one that inspires you to create fearlessly. What’s your biggest challenge with lighting right now? Share your thoughts below and let’s grow together!
![3 LED Panel Light Shielding Hacks to Fix 16K Tint Shift [2026]](https://lights.creatorrigreviews.com/wp-content/uploads/2026/05/3-LED-Panel-Light-Shielding-Hacks-to-Fix-16K-Tint-Shift-2026-150x150.jpeg)


3 responses to “Effective RGB Tube & LED Panel Lights for Creative Studio Setup 2024”
I completely agree with the importance of choosing the right lighting to elevate your studio content. I’ve gone through a similar journey where I first relied on generic lights, only to find my footage was dull and lacked vibrancy. Since upgrading to high-CRI RGB panels with adjustable brightness and app controls, my workflow has become much smoother, and the results are noticeably better. I particularly found that flexible mounting options and consistent control over color temperature really helped me perfect my shots. Has anyone experimented with different mounting setups, like magnetic mounts or ceiling rigs? I’m curious whether these options truly make a significant difference in a small or tricky studio space. It feels like the little adjustments in positioning and gear quality really can transform the overall look and feel of your videos or photos.
This post really hits home for anyone who’s ever spent hours fiddling with lighting, only to be disappointed with the final look. I remember when I first upgraded to RGB LED panels with higher CRI scores; it was a game changer. Not only did my footage look more vibrant and natural, but I also found controlling the lights much more intuitive, especially with app-based controls. It’s fascinating how much the little details—like mounting options and even the choice of diffusion—can make a substantial difference in achieving that professional glow. I’ve been experimenting with magnetic mounts for flexibility, and I’d love to hear if others have noticed significant improvements or specific setups that worked well for small studios. From your experience, what’s the most effective mounting strategy for tight spaces? I believe the key is to find gear that’s adaptable yet sturdy—especially for those tricky angles or multi-light scenarios. It’s inspiring to see how thoughtful equipment choices can truly elevate our content, making the creative process much more enjoyable.
This article really underlines how crucial proper lighting is for content creation, especially with RGB tube and LED panels becoming more affordable and versatile. I personally learned the hard way that not all lights are created equal—when I first started, I bought a cheap RGB panel that promised a spectrum of colors but ended up flickering and inconsistent. Upgrading to a high-CRI, well-controlled light made a world of difference, particularly in capturing natural skin tones and vibrant hues without post-editing. The control aspect is also vital; I find that app connectivity and scene presets save me a lot of time during shoots, allowing me to quickly switch moods or match different environments. My biggest challenge now is figuring out how to effectively position multiple lights in a small studio without causing unwanted shadows. Has anyone found a particular mounting solution or layout that maximizes space while maintaining even coverage? Would love to hear tips on balancing setup complexity with flexibility.