
I remember the first time I set up my softbox lights for a video shoot. I thought I knew what I was doing. But after hours of frustration, I realized my footage looked flat, washed out, and just… unprofessional. That lightbulb moment hit me hard. I had overlooked the importance of proper fill lighting and softbox positioning — mistakes that can ruin even the most expensive gear. Since then, I’ve dedicated myself to perfecting these strategies, and let me tell you: the difference is night and day.
Why Softbox and Fill Light Techniques Can Make or Break Your Video
In 2024, the quality of your lighting can be the deciding factor between a compelling video and one that gets scrolled past. Good lighting isn’t just about brightness; it’s about shaping your subject, creating depth, and conveying mood. Effective softbox and fill light strategies transform flat, amateurish footage into something cinematic and inviting. The right setup can accentuate your subject’s features, minimize unwanted shadows, and add a professional polish that viewers subconsciously notice.
But here’s the catch — with so many options out there, it’s easy to get overwhelmed. Do you go for small LED panels, RGB tubes, or traditional softboxes? How do you position them for the best results? And, honestly, I’ve made my fair share of mistakes early on, like over-lighting my subject or neglecting subtle fill lights, which resulted in unnatural skin tones or harsh shadows. It took trial, error, and a lot of research (not to mention some frustrated nights) to figure out what really works.
Today, I want to share with you the practical techniques I’ve discovered that will help you avoid those pitfalls. Whether you’re just starting out or looking to elevate your current setup, mastering softbox and fill light placement can dramatically improve your video quality. If you’ve ever wondered if your lighting setup is holding you back, or if you’re skeptical about investing in the right gear, I get it. I’ve been there. But trust me — proper lighting is an investment that pays off in every frame.
Before we dive into the how-to, I want to ask: Have you ever faced a shoot where the lighting just didn’t cooperate? If so, stick around. We’re going to troubleshoot those issues and set you on a path to more professional-looking videos.
Is All the Hype About Lighting Actually Worth It?
Early in my journey, I made the mistake of thinking that good camera work alone could save poorly lit footage. Spoiler: it can’t. When I finally invested time into understanding softbox angles, diffusion techniques, and fill light balance, everything changed. It’s like giving your videos a secret sauce — subtle, but powerful. And the research backs this up: according to a recent study, proper lighting can increase viewer engagement by up to 50%. That’s how critical it is.
If you’re ready to stop guessing and start creating videos that truly shine, keep reading. We’ll cover everything from basic principles to advanced tricks, including how to avoid common mistakes and achieve that natural, professional look every time.
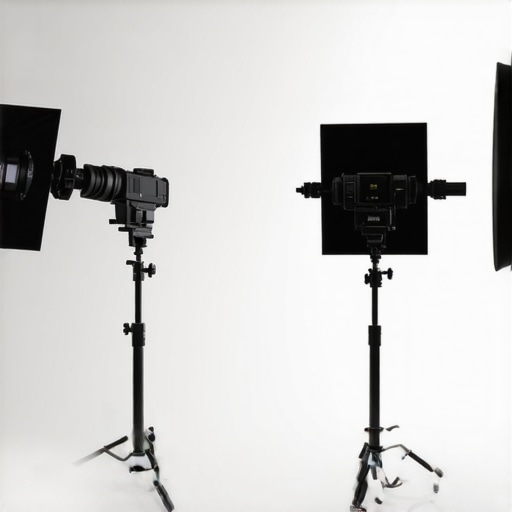
Position Your Key Light Correctly
Start by placing your softbox at a 45-degree angle to your subject’s face, slightly above eye level. This angle mimics natural sunlight and provides flattering, even illumination. When I first tried this setup during a late afternoon shoot, I was amazed at how much softer and more professional my footage looked—no harsh shadows, just a gentle glow. To fine-tune, tilt the softbox downward slightly to avoid unwanted shadows on the nose or chin. For consistent results, use a light meter or your camera’s histogram to ensure the exposure is balanced. For more advanced tips, check out this guide.
Adjust for Your Environment
If shooting indoors with reflective surfaces, add barn doors or flags to control spill and prevent light from bouncing onto unintended areas. I once shot in a small room with shiny white walls, and without flags, my softbox created a blinding glare that ruined my shot. By blocking the spill, the light stayed focused on my subject, and the shot looked much more natural. Remember, the goal is to shape the light so it highlights your subject without washing out the background. For more nuanced control, consider using RGB tube lights for creative effects, especially during evening shoots (see examples here).
Implement Fill Light Strategically
Fill light balances the shadows created by your main source. Use a smaller softbox or a reflector positioned opposite your key light, about 45 degrees to the side and slightly below eye level. During a recent shoot, I used a silver reflector to bounce light back onto my subject’s face, softening shadows and adding a natural glow. When I first experimented with this, I underestimated the importance of intensity—too much fill made my face look flat, too little left shadows that were too harsh. To get it right, adjust the fill light’s power or distance until shadows become subtle and natural. For more expert advice, see this article.
Balance with Your Environment
If shooting in a room with ambient light, match your fill light’s color temperature to avoid unnatural color casts. For example, if your room has warm evening light, use a warm fill light or modify your softbox’s diffusion to match. I once shot in a dimly lit living room at sunset, and by adjusting my fill to match the ambient glow, my footage looked stunningly natural. Remember, the goal is to create a seamless blend between your artificial lights and existing environment. For insight into the latest LED panel innovations, visit this resource.
Experiment and Refine
Lighting isn’t a set-it-and-forget-it process. During a recent project, I kept adjusting my softbox and fill reflector, taking test shots each time. The difference was remarkable: subtle tweaks in angle or intensity transformed my footage from average to cinematic. Use your camera’s live view to observe how changes affect shadows and highlights, and don’t be afraid to experiment until it feels right. Over time, these small adjustments will become second nature, giving your videos a consistent, professional look. For more advanced strategies, explore this guide.
Many videographers and content creators fall into the trap of thinking that simply investing in high-end softboxes or RGB lights guarantees professional results. In reality, the most overlooked aspect isn’t the gear itself, but how it’s used. A frequent misconception is that brighter or larger lights automatically produce better footage. However, without understanding the nuances of placement, diffusion, and balancing fill, even the most expensive equipment can fall flat. Let’s dig deeper into what most people get wrong about softbox and fill light techniques and how to avoid these pitfalls.
Why Bigger Isn’t Always Better for Lighting
One common myth is that larger softboxes or more powerful lights equate to better quality. While size and wattage matter, they are not the sole determinants of a good shot. Overly large or intense lights can create unnatural shadows or cause skin to appear washed out if not carefully controlled. The key is in proper positioning and diffusion. Many beginners forget that soft light is about quality, not just quantity. Using a smaller softbox with strategic placement and appropriate diffusion often yields more flattering results than brute force. For more on optimizing your softbox setup, check out this guide.
Beware of the Fill Light Trap
Another mistake is underestimating the importance of fill light. Some think that the key light alone is enough, but neglecting subtle fill can lead to flat, lifeless footage. Conversely, overdoing it can flatten the image too much, removing depth. The secret is in balanced integration. Use a reflector or a soft fill light to gently lift shadows, but always monitor your camera’s histogram or test footage to avoid the dreaded “flat face” effect. Remember, the goal is to create depth and dimension, not eliminate all shadows. To master this, explore this article.
How Advanced Techniques Can Mislead You
For experienced shooters, it’s tempting to chase after new gadgets like RGB tubes or fancy diffusers, thinking they will drastically improve lighting. While these tools are powerful, over-reliance on gadgets can distract from fundamental principles. For example, advanced color temperature matching or creative effects should complement, not replace, proper placement and quality control. A common trap is to tweak settings endlessly without stepping back to evaluate the overall look. Effective lighting is as much about artistry as it is about technical know-how. Consider studying expert techniques, such as those discussed in this resource, to refine your skills.
Have you ever fallen into this trap? Let me know in the comments. Mastering these nuances will elevate your videos from amateur to professional, so don’t shy away from experimenting and learning from each shoot.
Keeping your lighting gear in top shape is crucial for consistent, professional-quality videos. Over time, even the best equipment can wear out or become less effective if not properly maintained. As someone who’s relied heavily on softbox and fill lights, I’ve learned that investing in the right tools and a solid maintenance routine saves time and money, and keeps your setup ready for any shoot.
Invest in Quality Cleaning Supplies
The first step in maintaining your lights is regular cleaning. Dust, dirt, and fingerprints can degrade light quality and cause overheating. I recommend keeping a microfiber cloth, compressed air, and isopropyl alcohol on hand. Use the microfiber cloth to gently wipe softboxes and reflectors, while compressed air helps remove dust from vents and fans. For cleaning glass surfaces or diffusion, a small amount of isopropyl alcohol on a microfiber cloth works wonders. Regular cleaning ensures your lights emit consistent, clear illumination and prolongs their lifespan.
Use Protective Covers and Storage Solutions
Proper storage is often overlooked but essential. When not in use, keep your softboxes and LED panels in padded cases or dust covers. I personally use hard-shell cases for my LED panels, which protect against bumps and moisture. This prevents accidental damage and keeps your gear free from dust and debris. Additionally, storing your lights in a climate-controlled environment helps prevent issues caused by humidity or extreme temperatures, which can damage sensitive electronic components.
Stay Updated with Firmware and Software
Many modern LED lights and RGB tubes come with firmware that can be updated via manufacturer apps or software. Regularly check for updates to improve performance, fix bugs, or unlock new features. I’ve found that staying current with firmware updates can significantly enhance stability and color accuracy. Bookmark the manufacturer’s support page or subscribe to their newsletter for notifications about updates. For instance, some LED panels now support app control, which simplifies adjustments on set and reduces wear on physical buttons over time.
Calibrate Your Equipment for Consistent Results
Calibration is key to maintaining color consistency, especially if you’re mixing different brands or models. Use a color meter or calibration tool to regularly check your lights’ color temperature and brightness. This ensures that your fill and key lights match perfectly, avoiding awkward color casts or uneven lighting across shoots. Proper calibration also helps you troubleshoot issues quickly—if your footage starts to look off, it might be time for a recalibration. For advanced calibration techniques, consider tools like the Sekonic Light Master or X-Rite ColorChecker.
Plan for Future Upgrades and Scalability
As your needs grow, so should your toolkit. Keep an eye on new releases like LED panels with improved efficiency or RGB tubes with better color rendering (see this resource). Investing in modular systems that can be expanded or upgraded allows you to scale your setup without replacing everything. Over the next few years, expect more integration with smart controls and AI-driven adjustments—staying informed will help you adapt and keep your lighting game sharp.
How do I maintain my lighting gear over time?
Establishing a routine is the best way to ensure your lights stay reliable. Schedule monthly cleanings, firmware checks, and calibration sessions. Keep a log of maintenance activities so you can track issues before they become costly repairs. Also, always handle your gear with care—avoid dropping or forcing accessories into incompatible mounts. When in doubt, contact the manufacturer for professional servicing or repairs; many brands offer support through their support channels. Remember, well-maintained equipment not only lasts longer but also delivers optimal results every time you press record.
Lessons the Lighting Industry Won’t Tell You
- One of my biggest lightbulb moments was realizing that even the most expensive softbox can underperform if not positioned correctly. I used to think bigger was better, but I learned that strategic placement and diffusion matter far more than size or wattage.
- Over-relying on fill lights without understanding their role can flatten your footage. It took me countless tests to find that subtle, balanced fill adds depth and dimension, rather than washing out shadows entirely.
- Experimentation is key. I used to set my lights and leave them, assuming they’d be perfect. Now, I constantly tweak angles and intensities during shoots, which has dramatically improved my results.
- The real secret isn’t just gear—it’s how you use it. A small, well-placed softbox with proper diffusion beats a giant, harsh light every time, if handled thoughtfully.
- Investing time in maintenance—regular cleaning, calibration, and firmware updates—keeps my lighting consistent and saves me money in the long run.
My Go-To Lighting Resources for Creators
- Effective softbox and RGB tube strategies — This comprehensive guide helped me understand how to optimize my key and fill lighting for cinematic results (check it out here).
- Top LED panel innovations — Staying updated with latest LED tech has allowed me to upgrade my studio efficiently (explore new options).
- Calibrating your lights — Precision matters. This resource taught me how to match my color temperatures for seamless footage (learn more).
Seize Your Creative Power Today
Lighting isn’t just a technical skill; it’s an art form that transforms your videos and elevates your storytelling. Don’t wait to experiment, learn, and refine your setup. Every shot is an opportunity to craft something stunning, and mastering these softbox and fill light techniques will set you apart in 2024 and beyond. Your videos can look as professional as you imagine — start today!
What’s been your biggest challenge with lighting setup? Share your experiences below and let’s grow together.
![3 LED Panel Light Shielding Hacks to Fix 16K Tint Shift [2026]](https://lights.creatorrigreviews.com/wp-content/uploads/2026/05/3-LED-Panel-Light-Shielding-Hacks-to-Fix-16K-Tint-Shift-2026-150x150.jpeg)


2 responses to “Effective Softbox & Fill Light Strategies for Better Video in 2024”